How to take screenshots with watch "frame" for the store

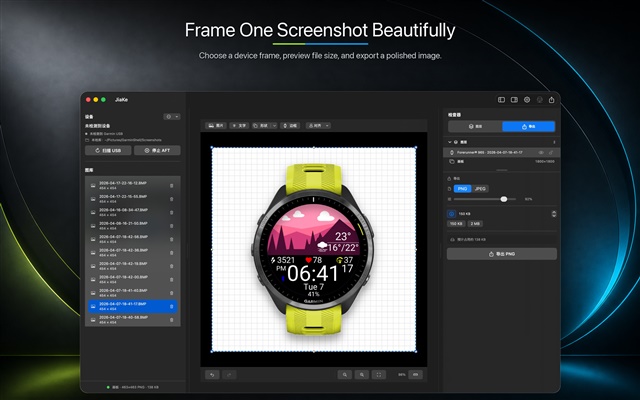
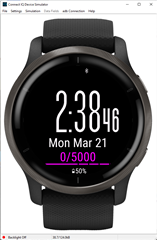
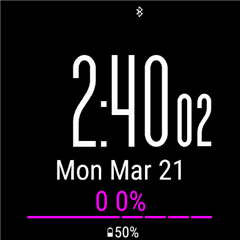
How do you create the screenshots for the store listing? I found how to create screenshots in the simulator > File > Save screen capture menu, but that only contains the "canvas". I'd like to have the watch around it, as it is in most of the screenshots I see in Connect IQ store.

Top Replies

All Replies

  • On, windows, alt-ctrl-PrintScreen, then paste into a photo editor and trim it.  It's best if you make the resulting image square (say 400x400 pixels)

    The overy lay images for the devices are in the specific device folder for that device, so you can put that over the result of the screen capture.

    The overlay for the venu2, and the screen captue for example:

    You can also take a screen shot on some devices, and again use the overlay for that device

    (Screen shot from an Instinct 2)

    and another option is just taking a picture of the app on the device.

  • The windows snipping tool or snip and sketch are much easier than alt-printscreen as you can capture on the initial grab the exact portion of the screen you want.  You still may want to use the image editor to make it square or resize to fit.

    recent versions of Windows 10 even add a Win Key+Shift+S shortcut to start a capture.

    support.microsoft.com/.../use-snipping-tool-to-capture-screenshots-00246869-1843-655f-f220-97299b865f6b

  • This was probably first requested in 2015 and since there are many simple workaround (as seen with many apps in the store), I'd give it 0 traction.

    With an alt-ctrl-PntScr, I can have a store-ready image in about 1 minute.

  • Yeah, I would def edit the image to make it square, because if you don't, the store website will not auto-crop the image or display it as its original shape, but instead distort it so that it's rendered as a square. (At least the Connect IQ app does not have this issue.)

    That's why if you browse the store website casually, you'll see a lot of listing images with squashed watches (oval instead of round), which IMO reflects really badly on Garmin (unless they don't care what their store looks like.)

    I mentioned this in the forums 3 years ago, but to be fair I didn't open a bug report, because quite frankly, I don't expect it to ever be fixed (and I figured that the bug reports section wasn't really for the CIQ store.)

    +1 for using the snipping tool in Windows. On a Mac, I would use CMD-SHIFT-4 to capture a rectangular area as a screenshot.

  • Hi Jim

    Where do you find the Overlay image for the device?

  • hi, on windows, you can find them here:

    C:\Users\[YOUR NAME]\AppData\Roaming\Garmin\ConnectIQ\Devices

  • I hate to comment on a dead thread, but since it's already been necro'd, there is no (default) Alt-Ctrl-Print Screen shortcut in Windows. (Also, not that it matters, but the usual convention for writing Windows shortcuts is Ctrl-Alt-... or Shift-Alt-..., not the other way around.)

    The actual shortcuts are:

    Print Screen: Take a screenshot of the entire screen (if your desktop is extended across multiple monitors, the screenshot includes all of them)

    Alt-Print Screen: Take a screenshot of the active window (if you press Ctrl-Alt-Print Screen, this is what you're getting.)

    I definitely recommend the built-in Snipping Tool in Windows 11 (Win-Shift-S) as sabeard said. It has easy-to-select modes: fullscreen, rectangular, window or freeform. And after you've selected an area to snip, a window pops up which allows you to edit the snip (crop/mark up) and save it to a file. You can also have the tool automatically save snips for you. It's a lot more advanced and convenient than the plain old Print Screen or Alt-Print Screen functionality. In Windows 10, you may not have the built-in Snipping Tool, but a similar tool exists in the Microsoft store for free, with very similar functionality to what's described above.

    However, if you want to use the old functionality, it's just Alt-Print Screen (for the current window).

  • Hi

    Thanks Shent-Aurkhan (SHN), FlowState

    As a new user it seems definitely all very odd and incompatible.

    The default Venu 2 Plus overlay is already bigger in pixels [601x911] and KBs [173KB] than that allowed for in an upload. Which means a fair amount of manipulations to arrive at something acceptable for the image upload.

    Why the simulator, or on watch screenshots, don't have the option to produce an image that can be used directly in the upload is weird, as that's what they are primarily intended for.

    Currently the overlay and images have to be combined before resizing to 500x500, or both done before combining.

    It would be so simple to have screenshots and permitted uploads matching and save developers lots of time. And provide a consistent mechanism where screenshots are already the correct shape and size to be to added.

    May be the simple solution would be to adjust the 500x500 150KB restrictions so that it accepts the image sizes currently generated including any overlay.

  • forums.garmin.com/.../feature-request-add-screenshot-for-store-that-includes-the-watch-skin-to-the-simulator they want us to become digital art designers, photoshoppers, etc... as if we don't have enough problems yet