Watchface: M1

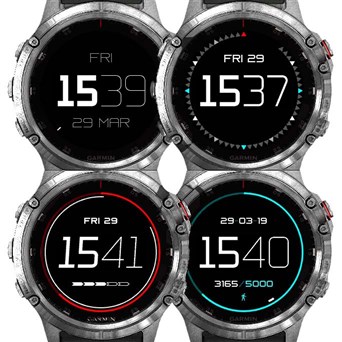
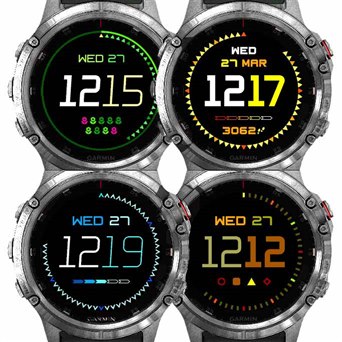
Support thread for the M1 series of digital watch faces (see M1 Lite and M1+). High-quality minimalist design, with a seconds indicator moving around the outside of a clean stylish display.

I'll post some tips and suggestions on changing the settings below, as there are a lot of options. Plus if there are any questions or problems feel free to post them and I'll try to answer!

M1 Lite is recommended for learning the settings initially - it has up to 3 data fields which you can customise.

M1 has the same options as M1 Lite, but allows up to 8 data fields. It also has profiles for saving different custom styles - and these can be activated automatically at specified times. But setting up the fields for M1 is more complicated! Whereas the settings for M1 Lite show you the options for all 3 fields at once, with M1 the settings only show and allow you to change one field at a time (and the watch just remembers the other 7 fields).

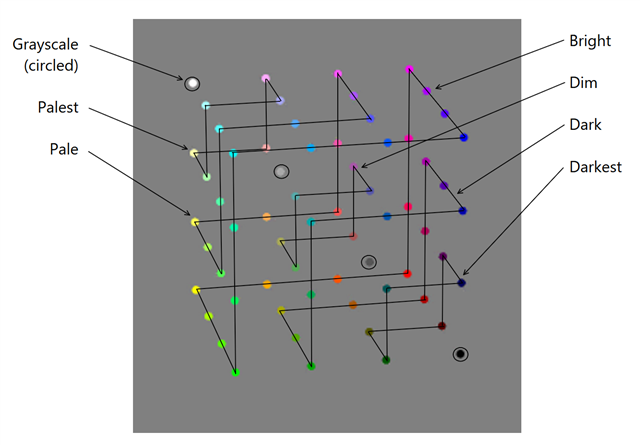
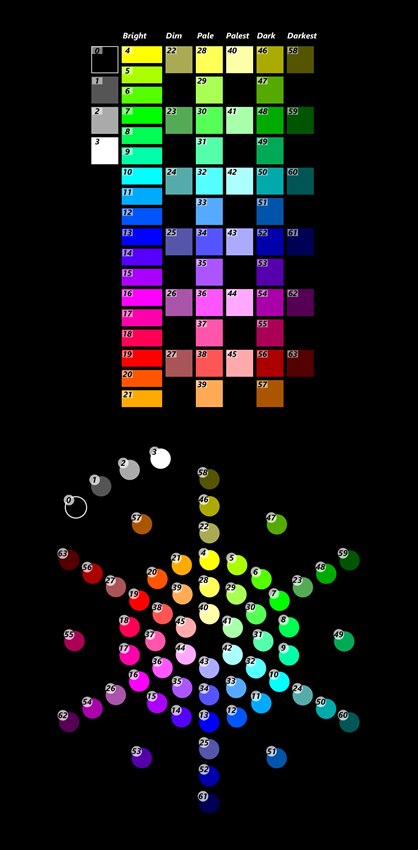
M1+ has more field data options than M1 but colors must be entered as RRGGBB or number (use the link in settings or see post below for a list). Extra field data options include: sun events, 2nd time zone, heart rate, calories, intensity minutes, distance, pressure & altitude. Profiles are compatible between M1 & M1+ so you can export and import between the two.

Known Issues

  • And I wanted to make a post about colors! When I set out to make a watch face, I wanted to allow any of the 64 available colors to be selected, and ideally through a list so it was (fairly) easy to select them. But the problem was how to present a list of 64 colors in an understandable way, by grouping them into categories. E.g. maybe reds, greens, blues or similar would work. But I searched around the web and couldn't find any standard way of presenting a 64 color palette as a list.

    Eventually I came across a Wikipedia page listing different color palettes: https://en.wikipedia.org/wiki/List_of_color_palettes

    And it had a cool image of the 6-bit RGB color cube: https://en.wikipedia.org/wiki/List_of_color_palettes#/media/File:6-bit_RGB_Cube.gif

    Seeing this, I realised you could create jagged slices through the cube, going from dark to light, and thought maybe that would work as a way to group the colors together:

    Some of the color names I got from http://chir.ag/projects/name-that-color and https://www.color-blindness.com/color-name-hue. Here's a table of all the colors with their RGB codes:


    Name


    Number

    Hex Code

    RRGGBB


    Name


    Number

    Hex Code

    RRGGBB


    Grayscale

    Black

    0

    000000

    Pale

    Lemon

    28

    FFFF55


    Dark Gray

    1

    555555


    Green Yellow

    29

    AAFF55


    Light Gray

    2

    AAAAAA


    Screamin' Green

    30

    55FF55


    White

    3

    FFFFFF


    Aquamarine

    31

    55FFAA


    Baby Blue

    32

    55FFFF

    Bright

    Yellow

    4

    FFFF00


    Maya Blue

    33

    55AAFF


    Lime

    5

    AAFF00


    Neon Blue

    34

    5555FF


    Bright Green

    6

    55FF00


    Pale Violet

    35

    AA55FF


    Green

    7

    00FF00


    Flamingo

    36

    FF55FF


    Spring Green

    8

    00FF55


    Brilliant Rose

    37

    FF55AA


    Bright Aquamarine

    9

    00FFAA


    Tomato

    38

    FF5555


    Cyan

    10

    00FFFF


    Pale Orange

    39

    FFAA55


    Azure

    11

    00AAFF


    Denim Blue

    12

    0055FF

    Palest

    Canary

    40

    FFFFAA


    Blue

    13

    0000FF


    Mint

    41

    AAFFAA


    Electric Indigo

    14

    5500FF


    Pale Blue

    42

    AAFFFF


    Violet

    15

    AA00FF


    Lavender

    43

    AAAAFF


    Magenta

    16

    FF00FF


    Rose

    44

    FFAAFF


    Pink

    17

    FF00AA


    Lilac

    45

    FFAAAA


    Torch Red

    18

    FF0055


    Red

    19

    FF0000

    Dark

    Citrus

    46

    AAAA00


    Strong Orange

    20

    FF5500


    Limeade

    47

    55AA00


    Orange

    21

    FFAA00


    Dark Green

    48

    00AA00


    Green Haze

    49

    00AA55

    Dim

    Olive Green

    22

    AAAA55


    Persian Green

    50

    00AAAA


    Fruit Salad

    23

    55AA55


    Cobalt

    51

    0055AA


    Tradewind Blue

    24

    55AAAA


    Dark Blue

    52

    0000AA


    Rich Blue

    25

    5555AA


    Purple

    53

    5500AA


    Tapestry Purple

    26

    AA55AA


    Dark Magenta

    54

    AA00AA


    Blossom Red

    27

    AA5555


    Lipstick

    55

    AA0055


    Dark Red

    56

    AA0000


    Tawny Orange

    57

    AA5500


    Darkest

    Verdun Green

    58

    555500


    Darkest Green

    59

    005500


    Sherpa Blue

    60

    005555


    Navy Blue

    61

    000055


    Tyrian Purple

    62

    550055


    Maroon

    63

    550000

    One interesting thing I noticed: each category has a multiple of 6 colors (I guess it's a cube after all …)

    And it also made me realise that without the grayscale "colors", there are 60 other real colors. And of course there are 60 seconds … so I had to try a mode where the indicator for each second was a different color.

  • Settings are grouped into a few main sections, from basic to advanced - see the step by step guide below, to add your first field as the settings are initially tricky!

    • Time - main hours & minutes display Seconds indicator - customize appearance and style
    • Ring Display - outer circular bar which fills up to show a value like steps count or battery
    • Fields - up to 8 of these (each with 6 elements), which can be positioned anywhere. Display things like:
      • Date (choose the elements to display and separators between them)
      • Status indicators (alarm on/off, notifications pending etc)
      • Values like step count, battery percentage
      • Move bar
    • Profiles - advanced tool to remember all the settings for the watch face, so you can switch between different styles. These can also be set to automatically activate between specified times.

    The best way to change advanced settings for M1(+) is by having the watch face currently active on your watch and using Garmin Connect Mobile or the Garmin Connect IQ Store app on mobile - this allows you to see changes quickly. If the watch face is not the active one on your watch then any changes won't be processed until you next make it the active one. Using Garmin Express will also work, but when you make changes in order for the watch to process them you need to disconnect the watch from the USB cable so the watch face is running (and then connect it again to see or update the settings) - this is particularly slow when retrieving field or profile settings.


    Note that in M1(+) the settings only show & modify the values for one field at a time - as specified by Field Number. When you send new settings then Field Management controls if it is turned on or off, and the other field settings below get applied. To modify another field, change the Field Number, position offsets and elements and send the settings again - the other 7 fields are not modified and are remembered by your watch.

  • Step by step guide for M1(+) on how to add an extra field/row of data underneath the time, displaying steps count:        

    1.   Make sure M1(+) is the current watch face on your watch

    2.   Open the settings in Garmin Connect Mobile or the Garmin Connect IQ Store app

    3.   Make sure Field Management is set to "On" - so the new field will be on

    4.   Set the Field Number to 2, to turn on the 2nd field. It was probably on 1 before (which is the field above the time)

    5.   Set the Vertical Offset to a negative number which means below the centre (-64 is a good value as the screen is 240 pixels high). In GCM if you have a problem entering the "-", then first enter 64, then move the cursor to the start of the line, and it will let you enter "-". Or copy the text "-64" from another app on your phone and paste it into the settings.

    6.   Set Element 1 to be "Steps" (and make sure the color for it is different from the background color)

    7.   Set Element 2 to be "Footsteps Icon" (if you want)

    8.   Set Elements 3-6 to all be "Not Set" (meaning empty or unused)

    9.   Save/send the settings to the watch

    10.  The new field should now appear underneath the time!


    If you want to show a notification icon instead of steps count, e.g. an alarm icon then do this instead:

    6.   Set Element 1 to be “Alarm Icon” (or another icon if you prefer)

    6a.  Set “Visible If..” (under Element 1) to be “Alarm On”

    6b.  Set “Color” (under Element 1) to be “White”


    Now an icon will be displayed only when your alarm is on.

    If you also want the icon to change when the alarm is off, then add this:

    7.   Set Element 2 to be “Alarm Icon” (or another icon if you prefer)

    7a.  Set “Visible If..” (under Element 2) to be “Alarm Off”

    7b.  Set “Color” (under Element 2) to be “Red”


    Now when your alarm is on there will be a white alarm icon, and when your alarm is off there will be a red alarm icon.

    Try changing the elements to different values and colors, or moving the position around.

    If you want to turn the field off again, change Field Management to "Off" and send the settings.

    You can create 8 different fields this way, one at a time, by changing the Field Number from 1 to 8.


    If you want to get back (retrieve) the settings for a field:

    1.   Make sure M1(+) is the current watch face on your watch

    2.   Open the settings

    3.   Set Field Management to "Retrieve"

    4.   Set the Field Number to the field you want settings for (e.g. number 1 for the field above the time)

    5.   Save/send the settings to the watch

    [5b. If you are using the CIQ Store app you must now back out of the settings by clicking the left arrow - if you are using GCM then it closes the settings for you automatically]

    6.   Open the settings again - and now the values displayed are for the field you specified


    You can now modify the values and send the settings to see them updated.


    If you want to turn off a field:

    1.   Make sure M1(+) is the current watch face on your watch

    2.   Open the settings

    3.   Set Field Management to "Off"

    4.   Set the Field Number to the field you want to turn off

    5.   Save/send the settings to the watch

  • Some general tips:

    • If you turn on or off the outer Ring Display, then also try turning on or off the "Seconds Move In A Bit" setting - this moves the seconds indicators inwards or outwards (and may slightly change their size).
    • Try using the "Demo Display" setting (at the bottom) or "Seconds Color Demo" setting to help choose colors. They may help, or they may not!
    • Create a Move Bar with different color segments by entering multiple Move Bar elements in the same field.
    • You can make Notifications Count only Visible If ... your phone is connected.
    • What does the Ring Display show when you hit your daily steps goal?
    • It should be cheap to run anyway, but if you really need to optimise battery usage this is my guess for the Seconds Indicator options from cheapest to most expensive: off, show on gesture, refresh every minute, refresh alternate minutes, refresh every second.
  • Playing with different representations of the 64 color palette Slight smile

  • These are all the "general" settings (covering Time, Seconds and Ring):

    Background Color - the color of the background(!)

    Time Display - toggle whether the main time is displayed or not. Choose "Show On Gesture" if you only want it displayed for 10 seconds when you use a glance gesture to look at your watch. If you have the large main time turned off, then you could display the time in a smaller format using on of the fields instead.

    Time Add Leading Zero - toggle on or off a leading zero for the main time display (and also any fields where you display a time, like sun events or 2nd time zone).

    Time Colon Separator - turn on a colon separator between hours and minutes of the main time. If you have the colon separator turned on then I tend to think it looks best if the hours & minutes are set to use the same font.

    Time Hours Font - select which font to use for the main hours display: either choose the custom font (and the line width of that font), or use one of the system fonts instead. Select the colour for the hours using the setting underneath this one.

    Time Minutes Font - select the font to use for the main minutes display (and the color using the setting underneath).

    Time Custom Fonts Italic - if you are using the custom font for the main time display, then this option makes the custom font be drawn in italic - for extra dynamism!

    Time Vertical Offset - shift the main time up or down slightly in pixels from the middle (the display is 240 pixels high in total). Positive values shift the time up, and negative values shift the time down. Normally I just leave this at 0, but sometimes it's useful if you want to make a bit more space above or below for field data.

    Seconds Display - toggle whether the seconds indicator is displayed or not. Choose "Show On Gesture" if you only want it displayed for 10 seconds when you use a glance gesture to look at your watch.

    Seconds Indicator Style - choose the shape of the seconds indicator to use.

    Seconds Refresh Style - affects how the seconds indicator moves during each minute. Every Second = one indicator moving around the outside. Every Minute = indicators increment through the minute and then refresh to none again at the start of the minute. Alternate Minutes = indicators increment one minute, and then decrement the following minute.

    Seconds Color - the default color for the second indicators.

    Seconds Color At XXXX - four settings here to change the color of the second indicators depending on where they are in the minute.

    Seconds Color Demo - displays every second indicator using one of the different available 64 colors (by ignoring the 4 grayscale colors). To convert from the second number to the "color number" used by M1, add 4 to the second number. So the color at second 0 is color 4 (yellow).

    Seconds Move In A Bit - just moves the seconds indicator inwards slightly, which is mainly useful if you have the outer ring turned on and don't want the seconds to overlap it.

    Ring Display - toggle whether the seconds indicator is displayed or not. Choose "Show On Gesture" if you only want it displayed for 10 seconds when you use a glance gesture to look at your watch.

    Ring Mode - select what value the outer ring will display:

    • Plain Color - draws the whole ring in the "filled" color
    • Steps - represents your percentage of daily steps complete to your goal. Once you go past 100% then the ring displays a 1 second gap which moves around to show 100% to 200%. After 200% then the gap becomes 2 seconds wide until it reaches 300%, and so on.
    • Battery Percentage - 0 to 100%.
    • Hours - shows the current hour using either 24 or 12 hours from empty to full depending on your system setting.
    • Minutes - shows the current minute.

    The following can only be set up in M1+, so use that version if you want any of these:

    • 2nd Time Zone Hours - shows the current hour in your 2nd time zone (specified in a setting below).
    • Sunrise To Sunset (now top) - displays the time range from sunrise to sunset as a fraction of 24 hours, with the current time "now" always at 0 o'clock (at the top). Times in the future are clockwise, and times in the past are anticlockwise - so in effect the ring rotates anticlockwise as time passes.
    • Sunrise To Sunset (midnight top) - displays the time range from sunrise to sunset as a fraction of 24 hours, with midnight always fixed at the top at 0 o'clock.
    • Sunrise To Sunset (noon top) - displays the time range from sunrise to sunset as a fraction of 24 hours, with noon always fixed at the top at 0 o'clock.
    • Intensity Minutes (weekly) - represents your percentage of intensity minutes completed towards your weekly goal. Once you go past 100% then the ring displays a 1 second gap which moves around to show 100% to 200%. After 200% then the gap becomes 2 seconds wide until it reaches 300%, and so on.
    • Smart Intensity Minutes (increasing daily) - this is the same as the normal intensity minutes, but it sets the goal for the day to depend on how many days of the week have passed so far. On day 1 of the week, the goal is 1/7th of your weekly goal. On day 2 of the week, the goal is 2/7ths of your weekly goal. And so on.
    • Heart Rate - displays your heart rate as a percentage of your Zone 5 Maximum (from your user profile). This is calculated once a minute, unless you use a glance gesture when it will update every second for about 10 seconds.

    Note: sunrise and sunset calculations require a GPS lock after you first install the watch face or if you have a large change in location. To do this start an activity, e.g. a run or hike, wait for GPS lock, stop the activity and discard it.

    Note 2: for sunrise and sunset calculations you can enable altitude adjustment using the "Sunrise/Sunset Altitude Adjustment" setting right at the very bottom - this then takes account of your current altitude above sea level, which can make a few minutes difference to the times. The Altitude Adjustment setting is global, and is not saved in any of the profiles, so it will affect any profile you use.

    Ring Color Filled - the color to use for the "filled" part of the ring, or unset to not be drawn.

    Ring Color Unfilled - the color to use for the "unfilled" part of the ring, or unset to not be drawn.

  • These are the "field" settings:

    Field Font - selects which size of font to use for the fields (the same font is used for all of them). There are 3 sizes of custom font, and 5 system fonts.

    Field Custom Fonts Weight - if you select to use one of the custom fonts for fields, then use this to also select a weight (line thickness) for the font.

    Field System Fonts Case Override - if you select to use one of the system fonts, then you can use this to force day & month names to be all upper or lower case, or allow them to stay mixed case (with the first letter capitalized). Note that the custom field fonts only contain capital letters, so with those you have no option!

    Field Name Font When Custom Unsupported - the custom field font only supports numerals, some punctuation, the Latin alphabet plus some diacritics. So if you are using the custom font and your watch is using a system setting for a non-Latin alphabet then M1 can't correctly display day and month names in your language (but the custom font can still be used to display numbers). In this case the day and month names are instead displayed using one of the system fonts - you can use this setting to specify which particular system font should be used (for day & month names) depending on which looks best to you. Or if you don't like the mix of numbers in custom font and names in system font, then you can just use a system font for everything by customizing the "Field Font" setting above.

    Field Move Bar Off Color - when this is set then it specifies the color for every move bar segment displayed in any field to use when it has not been activated yet, and is drawn in outline. (Leave this unset or blank for move bar segments to keep their color when inactive.)

    E.g. normally a move bar might look like this as segments fill (at 60, 75, 90, 105, 120 minutes):

    But if you specify the "Move Bar Off Color" as Dark Gray (color number 1) then it would look like this instead:

    <image redacted> - forum won't let me load it!

    (Note that the colors of individual move bar segments can be customized and set when you add the move bar to a field - see below.)

    Status Move Bar Alert Trigger - if you want to have a status indicator for when the move bar reaches a specific number of filled segments (from 1 to 5), then use this setting to specify that number of segments! This is used in conjunction with the "Visible If …" settings for field elements (see below): "Move Bar Alert Triggered" and "Move Bar Alert Not Triggered". The different segments of the move bar get activated after a certain number of minutes of inactivity: 60, 75, 90, 105 or 120 minutes respectively. So if you don't want a move bar visible all the time, you could make a single icon appear after 90 minutes of inactivity by setting "Status Move Bar Alert Trigger" to 3. Or you could make a whole move bar appear. Or you could make one thing disappear and something else appear instead (e.g. change the color of your daily steps goal).

    Status Battery High Percentage - if you want to display status indicators for high, medium or low battery on your watch, then this value specifies the threshold for high battery percentage (0-100%). Use this in conjunction with the "Visible If …" settings for field elements (see below): "Battery High" and "Battery Medium" (between high and low).

    Status Battery Low Percentage - if you want to display status indicators for high, medium or low battery on your watch, then this value specifies the threshold for low battery percentage (0-100%). Use this in conjunction with the "Visible If …" settings for field elements (see below): "Battery High Or Medium" (above low), "Battery Medium" (between high and low) and "Battery Low".

    2nd Time Zone Offset (M1+ version) - set the 2nd time zone offset in hours from UTC by entering a positive or negative integer.


    Then the important part for managing individual fields:

    In M1 Lite, there are 3 fields and settings for all 3 fields are available to see & edit at the same time. All the settings for field 1 first, then field 2, then field 3.

    In M1 and M1+, there are up to 8 fields, but in order to fit within the limitations of CIQ the settings for only one field at a time are available to see & edit - your watch just remembers the other 7 fields. Read the post with a step by step guide on how to add an extra field in this thread (above).

    Field Management - lets you specify whether the field is "Off" (not visible), "On" (always visible) or "Show On Gesture" (only visible for 10 seconds when you use a glance gesture to look at your watch).

    In M1(+) there is also "Retrieve" which is used to get back the settings for one of the fields that the watch is remembering. See the afore-mentioned step by step guide. When you use Retrieve then no other settings get applied. Just set Field Management to Retrieve, set the Field Number you want the settings for, save/send the settings, make sure the settings are closed if you use the CIQ Store app, reopen the settings and values for the field you specified will be there now.

    Field Number To Manage - this setting is only needed in M1(+) and specifies which of the 8 fields (numbered 1 to 8) you are changing or retrieving the settings for.


    Field Vertical Offset - the vertical offset of the field from the centre of the display in pixels. Positive values are upwards (above the centre) and negative values are downwards (below the centre). The screen is 240 pixels high, so you can specify a number between 120 and -120. (64 seems to be my favourite …) Note that in GCM it can be hard to enter the minus sign - it won't let you enter a minus if nothing else is in that setting - first you have to enter a number, and then click to move the caret to the start of the line before the number, and then it lets you enter the minus sign. Or you can copy & paste a number from another app … hoping Garmin fix this problem!

    Field Horizontal Offset - the horizontal offset of the field from the centre of the display in pixels. Positive values are to the right, and negative values are to the left. The screen is 240 pixels wide, so you can specify a number between 120 and -120.

    Field Horizontal Justification - specifies where the field is aligned horizontally relative to the horizontal offset you specified above. "Centre" means the field is centred about the offset. "Left" means that the left edge of the field is placed at the horizontal offset, so it extends to the right. "Right" means that the right edge of the field is placed at the horizontal offset, so it extends to the left. 

    When you are choosing the justification think about what elements are in the field, and if any of them will change in width (e.g. number of steps throughout the day) and how that will affect the space the field takes up. I often use left & right justification when I need to position two fields next to each other because I'm using more than 6 elements in a row (e.g. with status indicators turning on and off).

    Element settings x 6 - each field can have 6 elements which are displayed horizontally on the same row. For each element there are 3 settings you can select: what is displayed (the element itself), when it is displayed (it is visible if …) and the color to display it in.


    Element X - specifies the item displayed in this element of the field

    • Time And Date - choose items from this section to display the date in your preferred format. Where the description says "XX" or "XXXX" then that is a version which always displays with a fixed number of digits (2 or 4 respectively) padded with leading zeroes.
    • ISO Week numbers - the first week of the year always includes the first Thursday, and the first day of the week is set in your system settings (so it isn't strict ISO Week numbering unless your first day of the week is set to Monday).
    • Calendar Week numbers - 1st January is always in the first week of the year, and the first day of the week is set in your system settings. (So the last few days of the actual year, may be in the first week of the next Calendar Week year).
    • For 2nd time zone (M1+) use "2nd Time Zone Hours" + optional separator + "minutes"
    • Sunrise and sunset (M1+) - sunrise and sunset are calculated for the current day. Next sun event can be sunrise tomorrow (if your time is after sunset today). These calculations require a GPS lock after you first install the watch face or if you have a large change in location. To do this start an activity, e.g. a run or hike, wait for GPS lock, stop the activity and discard it. You can enable altitude adjustment using the "Sunrise/Sunset Altitude Adjustment" setting right at the very bottom - this then takes account of your current altitude above sea level, which can make a few minutes difference to the times. The Altitude Adjustment setting is global, and is not saved in any of the profiles, so it will affect any profile you use.
    • Separators - mainly used to format the date and time, e.g. a space between day & month, or a colon between hours & minutes.
    • Shapes And Icons - mainly used as status indicators or placed next to a value to show what that value is for.
    • Values And Bars - various useful & interesting values to display! For ones that have variable units (distance and altitude) use your system settings to switch between metric and statute.
    • Move Bar - displays a standard move bar with 5 segments which fill up incrementally to indicate your inactivity after X amount of time [60, 75, 90, 105, 120 minutes). Use the "Field Move Bar Off Color" setting above to set a color for off/unfilled segments if you want it different from the color you specify for the field element itself which is then used for the on/filled color only. If you want each segment of the move bar to be a different color then enter multiple Move Bar elements in the same field and give them different colors. 
    • Heart Rate (M1+) - updates once a minute normally, or every second when you use a glance gesture to look at your watch (high power mode for 10 seconds).
    • Heart Rate Bars (M1+) - displays a mini bar graph of heart rate over the last minute [12 bars of 5 seconds each). Updates once a minute normally, or every second when you use a glance gesture to look at your watch (high power mode for 10 seconds), or every 5 seconds when you first switch to the watch face (e.g. from a widget). Bar height is scaled as a fraction of your Zone 5 Maximum (from your user profile). <image redacted> - forum won't let me load it!
    • Heart Rate Axes (M1+) - add this as an element either before or after the Heart Rate Bars element to display some simple axes (in a different color to the bars). Vertical height corresponds to your Zone 5 Maximum heart rate. The appearance of the axes is slightly different depending on whether you add this element before or after the bars: <image redacted> - forum won't let me load it!
    • Active Calories (M1+) - shows the number of calories burned so far in the day, above the value accounted for by your BMR x 1.2. (The 1.2 is a standard scale used for sedentary/resting activity). Currently the automatic BMR is calculated using the Mifflin-St. Jeor equation - but this is different from the equation that Garmin seems to use so I'll adjust this once I know what it is. You can override the automatic calculation if you want by entering a value in the "Non-Active Calorie Override" setting (right at the bottom) - e.g. get the Resting Calorie value from the Garmin Calorie Widget at exactly 12:00 noon and then double it for the whole day.
    • Smart Intensity Goal (M1+) - a "smart" fraction of the normal intensity weekly goal that depends on how many days of the week have passed so far. On day 1 of the week, the goal is 1/7th of your weekly goal. On day 2 of the week, the goal is 2/7ths of your weekly goal. And so on.

    Visible If … - controls when this element of the field is visible. When an element is not visible then it doesn't leave a gap - the elements to either side are placed next to each other. Mainly use this to show/hide/change status icons.

    • On - element is always visible.
    • Do Not Disturb On / Off - visibility controlled by whether "do not disturb" is on or off for your watch.
    • Alarm On / Off - whether an alarm is set or not.
    • Notifications Pending / No Notifications - whether any notifications are pending or not.
    • Phone Connected / Not Connected - whether your phone is connected by Bluetooth to your watch or not.
    • LTE Connected / Not Connected - whether your watch is connected to LTE or not. If your watch does not have LTE then this element is always invisible if you use either of these settings.
    • Battery High Or Medium - whether your watch battery is in the high or medium zones (see the Status Battery High & Low Percentage settings above). Use this if you only want to show two battery states, with Battery Low.
    • Battery High / Medium / Low - whether your watch battery is in the specified zone (high, medium, low) (see the Status Battery High & Low Percentage settings above).
    • Move Bar Alert Triggered / Not Triggered - whether the move bar has reached your specified level and triggered or not (see the Status Move Bar Alert Trigger setting above).
    • AM / PM - whether the main time is in AM (morning) or PM (afternoon). E.g. if your watch is displaying times in 12 hour mode then use this to display an icon or "AM"/"PM" depending on whether it is morning or afternoon. 
    • 2nd Time Zone Is AM / PM (M1+) - whether the 2nd time zone is in AM (morning) or PM (afternoon).
    • Next Sun Event Is Rise / Set (M1+) - whether the next sun event at your location is sunrise or sunset. E.g. use this to change an icon which is next to elements displaying Next Sun Event Hours & Minutes.

    Color - select the color for the element. Try making separators and icons different colors than the elements either side of them.

  • (placeholder post for profile settings)

  • A guide for exporting & importing profiles.

    First your M1 watch settings need to be saved in one of the profile slots. If they already are then skip to exporting below.

    1. Make sure M1 is the current watch face on your watch
    2. Open the settings in Garmin Connect Mobile (GCM) or the Garmin Connect IQ Store app - the settings will now hold the values for whatever display is currently shown on M1
    3. Set Profile Management to "Save Profile"
    4. Set the Profile Number to the profile slot you want to save the settings to - this can be any number from 1 to 24
    5. Save/send the settings
    6. If you are using GCM then it will have automatically closed the settings, but if you are using the CIQ Store app then it is important that you manually back out of the settings by tapping the left arrow (otherwise the values of settings can't be updated by the watch)

    Step by step guide for exporting a profile:

    1. Make sure M1 or M1+ is the current watch face on your watch (whichever you want to export from)
    2. Open the settings in Garmin Connect Mobile (GCM) or the Garmin Connect IQ Store app
    3. Set Profile Management to "Export Profile"
    4. Set the Profile Number to the profile slot with the settings you want to export - this can be any number from 1 to 24 for user profiles (or 25+ for one of the pre-set profiles)
    5. Save/send the settings
    6. M1 should now be temporarily displaying the profile you chose you export (if it wasn't already doing so) so you can verify it was the right one - after 2 minutes the display will revert back to normal
    7. If you are using GCM then it will have automatically closed the settings, but if you are using the CIQ Store app then it is important that you manually back out of the settings by tapping the left arrow (otherwise the values of settings can't be updated by the watch - critically the export text strings!)
    8. Re-open the settings in Garmin Connect Mobile (GCM) or the Garmin Connect IQ Store app
    9. Scroll down to the bottom of the settings where there are 3 settings containing text strings:
    • Export/Import Profile Text - contains the settings for everything except fields
    • Export/Import Fields Text - settings for fields 1 to 4
    • Export/Import Fields Text - settings for fields 5 to 8

    An example of what these strings look like:

    • 0,0,Icons,0,1,false,4,3,2,3,false,0,1,0,2,1,2,3,10,19,false,false,0,0,19,63,6,3,0,24,-1,1,75,25,false,false,false,0,-1
    • 40,122,1,58,0,3,21,0,3,53,3,3,53,4,0,21,0,3,56,0,3,60,95,1,36,0,3,0,0,3,0,0,3,0,0,3,0,0,3,0,0,3,60,145,1,35,0,3,0,0,3,0,0,3,0,0,3,0,0,3,0,0,3,120,120,0,0,0,0,0,0,0,0,0,0,0,0,0,0,0,0,0,0,0
    • 120,120,0,0,0,0,0,0,0,0,0,0,0,0,0,0,0,0,0,0,0,120,120,0,0,0,0,0,0,0,0,0,0,0,0,0,0,0,0,0,0,0,120,120,0,0,0,0,0,0,0,0,0,0,0,0,0,0,0,0,0,0,0,120,120,0,0,0,0,0,0,0,0,0,0,0,0,0,0,0,0,0,0,0

    These strings will be reset back to blank when you next perform another change to the settings on M1, so now you need to make a copy of them! It's a pain the first time you do this, but it gets easier as you do it more often. I tend to copy the strings to a OneNote file which automatically syncs to the web & my PC, or you can copy them to a text file, or your own notebook of choice.

    On my Android phone I press and hold to select the string - sometimes I then need to select an option via the ":" to "select all". Then press and hold again and select the option to "copy". Switch app on your mobile device and paste the string to save it. Repeat for all 3 strings. 

    Step by step guide for importing a profile:

    1. Make sure M1 or M1+ is the current watch face on your watch (whichever you want to import to)
    2. Open the settings in Garmin Connect Mobile (GCM) or the Garmin Connect IQ Store app - the settings will now hold the values for whatever display is currently shown on M1
    3. Set Profile Management to "Import Profile"
    4. Set the Profile Number to the profile slot you want to import the settings to - this can be any number from 1 to 24
    5. Paste your 3 profile text strings into the 3 text fields in the settings: Export/Import Profile Text and 2 x Export/Import Fields Text. Note that the profile text must go in the correct text string. Whereas the field text could be swapped - this would just swap the field numbers.
    6. Save/send the settings
    7. M1 should now be temporarily displaying the profile you chose you import so you can verify it was the right one - after 2 minutes the display will revert back to normal
    8. If you are using GCM then it will have automatically closed the settings, but if you are using the CIQ Store app then it is important that you manually back out of the settings by tapping the left arrow (otherwise the values of settings can't be updated by the watch)
    9. Note that the imported profile will have copied any start and end activation times - so now reopen the settings and check those if you want to know when it will activate.

    Now copy the imported profile to your M1 watch settings if you want it to be the default display

    1. Open the settings in Garmin Connect Mobile (GCM) or the Garmin Connect IQ Store app - the settings will now hold the values for whatever display is currently shown on M1
    2. Set Profile Management to "Copy Profile To Watch Settings"
    3. Set the Profile Number to the profile slot you want to copy to the main watch settings - this can be any number from 1 to 24 for user profiles (or 25+ for one of the pre-set profiles)
    4. Save/send the settings
    5. If you are using GCM then it will have automatically closed the settings, but if you are using the CIQ Store app then it is important that you manually back out of the settings by tapping the left arrow (otherwise the values of settings can't be updated by the watch)
    6. M1 will now be displaying the profile you chose you copy. (If you have any automatic profile activations set up then it will keep displaying it for 2 minutes and then allow profile activations to happen as normal)
  • Thank you for your great and quick support! It works perfect!!!  :-)